How I Made My Own Token on Stellar with Stellar Lab
I made a token called ZARY on the Stellar testnet without writing any code. These are the exact steps I clicked through in Stellar Lab, plus what the issuer and distributor accounts are really for.
Muhammad Zaryab RafiqueFull Stack & Blockchain Engineer
9 min read
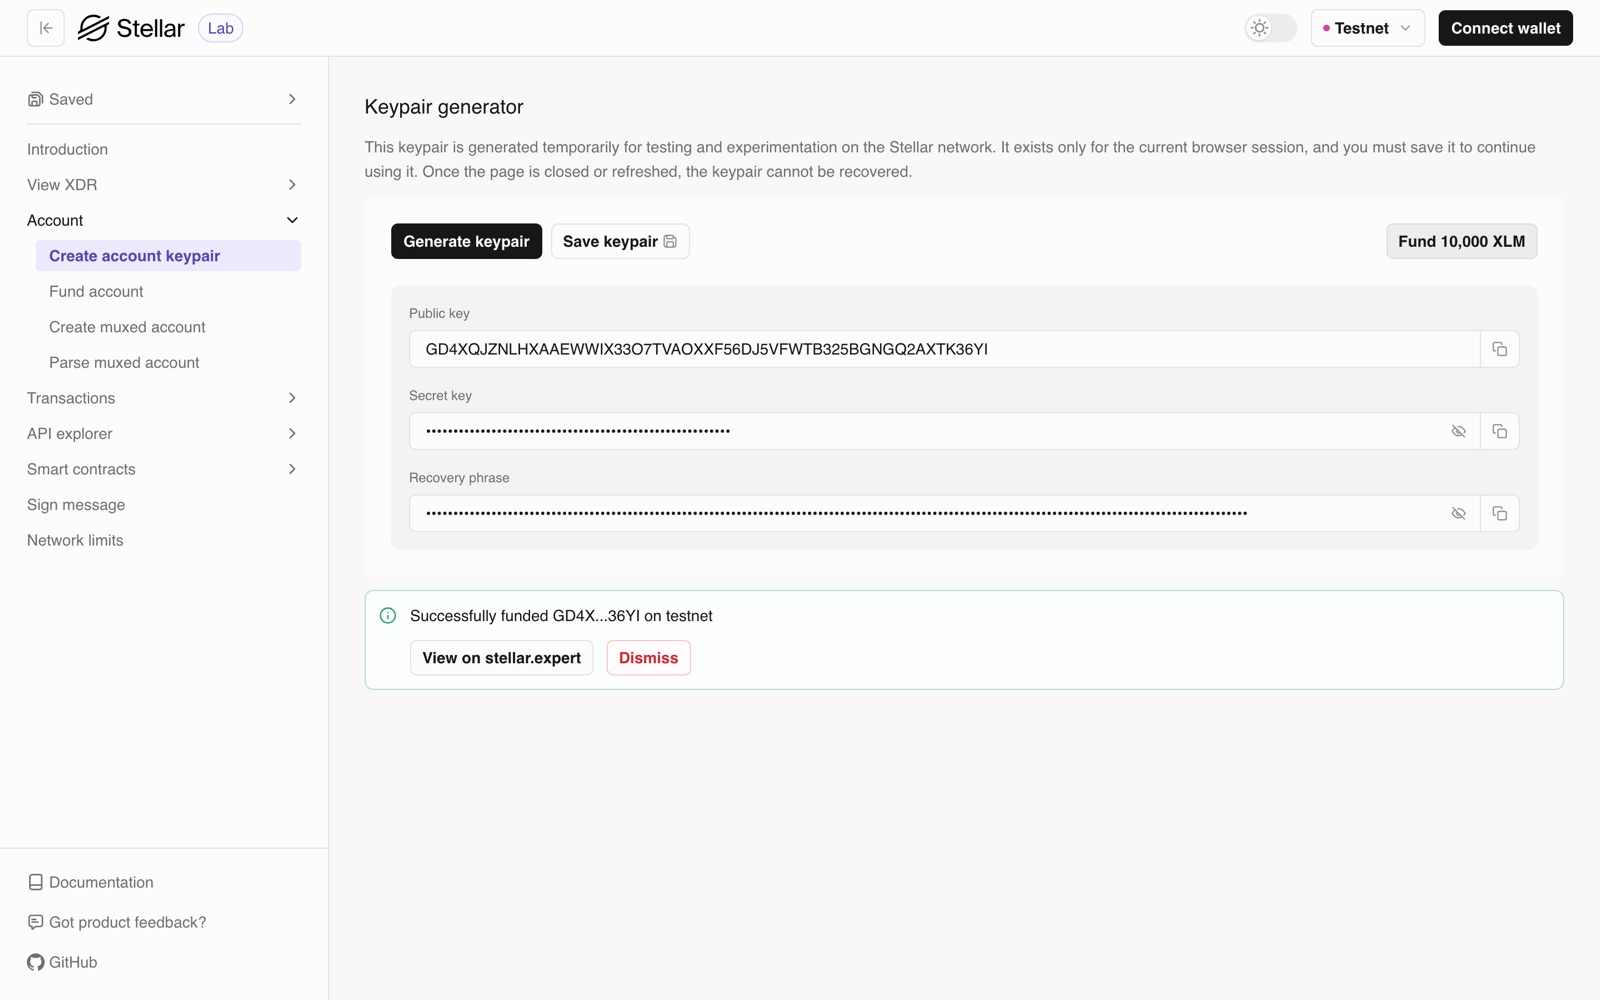
When I first decided to make a token on Stellar, I assumed I'd be writing a smart contract. I had my editor open and was mentally preparing for a long evening. Turns out I didn't need any of it.
Tokens on Stellar (the docs call them "assets") are part of the network itself. There's nothing to deploy. You need two accounts and three small transactions, and you can do all of it from the browser in Stellar Lab. It took me about fifteen minutes, and most of that was copying keys around.
I went through the whole thing again while writing this, so every screenshot below is from a real run on testnet. My test token is called ZARY, and by the end it has a fixed supply of one million.
The part that confused me most at the start wasn't the clicking. It was why you need two separate accounts, an issuer and a distributor. So I'll start there.
Issuer and distributor
The issuer
The issuer is where the token comes from. I think of it as the printing press.
A few things about it surprised me. There's no "mint" button on Stellar. When the issuer sends ZARY to someone, that ZARY is created on the spot. Sending from the issuer is how you mint.
The issuer's address is also part of the token's identity. Anyone can create a token called ZARY, but mine is "ZARY issued by GD4X…36YI", and wallets use that address to tell the real one apart from copies.
And the issuer never holds its own token. If ZARY gets sent back to it, it's simply burned. That felt odd to me until I thought of it like a mint: it prints money, it doesn't keep any in its pocket.
Since the issuer can create unlimited supply, you want to use it as little as possible. I use it once to mint and then lock it, which I'll show near the end.
The distributor
The distributor is a normal account that holds the tokens and hands them out. If the issuer is the printing press, the distributor is the shop.
It gets the whole supply from the issuer once. After that, it's the account you actually use, for sending tokens to people, doing airdrops, or putting the token up for sale on Stellar's built-in exchange.
The nice side effect is safety. If the distributor's key ever leaks, the damage stops at whatever that wallet holds. Nobody can print more ZARY with it.
Couldn't I just use one account?
You can send straight from the issuer, and for a quick experiment that's fine. For anything real I keep them separate. This table is how I explain it to friends:
| Issuer | Distributor | |
|---|---|---|
| What it does | Creates the token | Holds and sends the token |
| Holds the token? | Never, balance is always 0 | Yes, the full supply to start |
| How often I use it | Once or twice, then lock it | All the time |
| If the key leaks | Someone can print unlimited tokens | You lose what's in that wallet |
It also makes the token easy to check. Anyone can look both accounts up on an explorer and see how much exists and where it went.
OK, on to the actual steps.
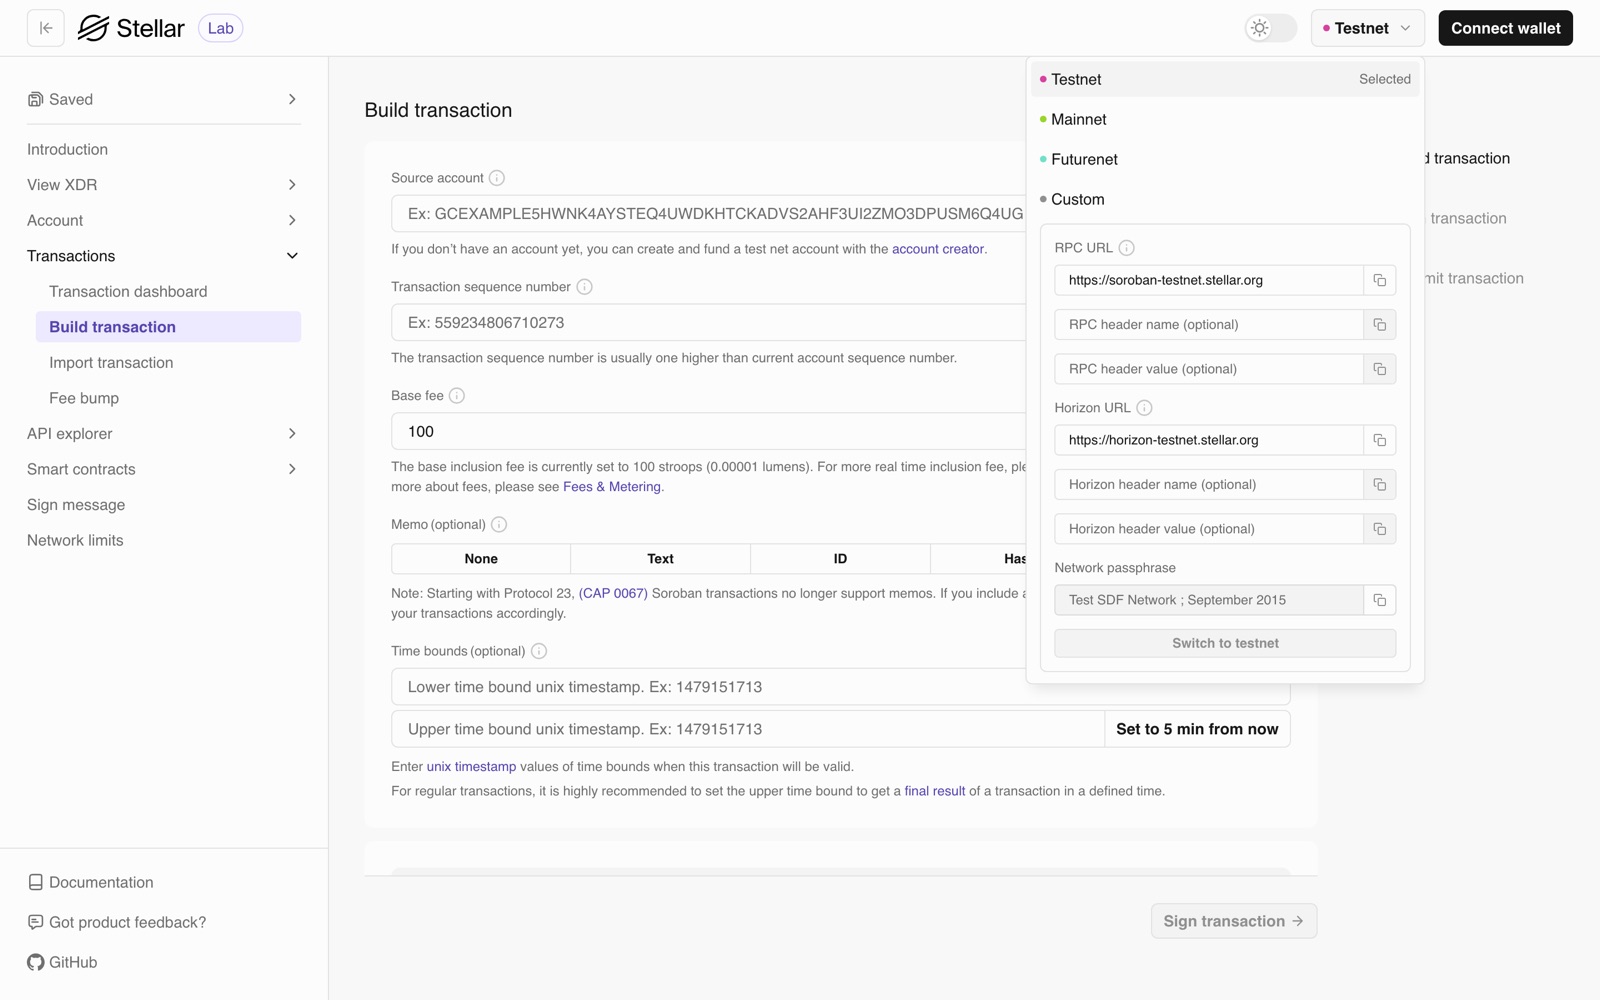
Step 1: Switch Lab to Testnet
Open lab.stellar.org and check the network dropdown in the top right. It should say Testnet.
Testnet is a practice network with free money, so nothing you do here costs anything. When you want to do it for real later, it's the same menu.
Step 2: Create the issuer
In the sidebar, open Account, then Create account keypair, and click Generate keypair.
You get a public key that starts with G, which is the account's address and fine to share, and a secret key that starts with S, which works like the account's password. Lab hides the secret behind dots by default. Don't share it with anyone.
Copy both into a notepad and write ISSUER above them. Lab tells you the keypair only lives in this browser session, and it means it. If you refresh before saving them, they're gone.
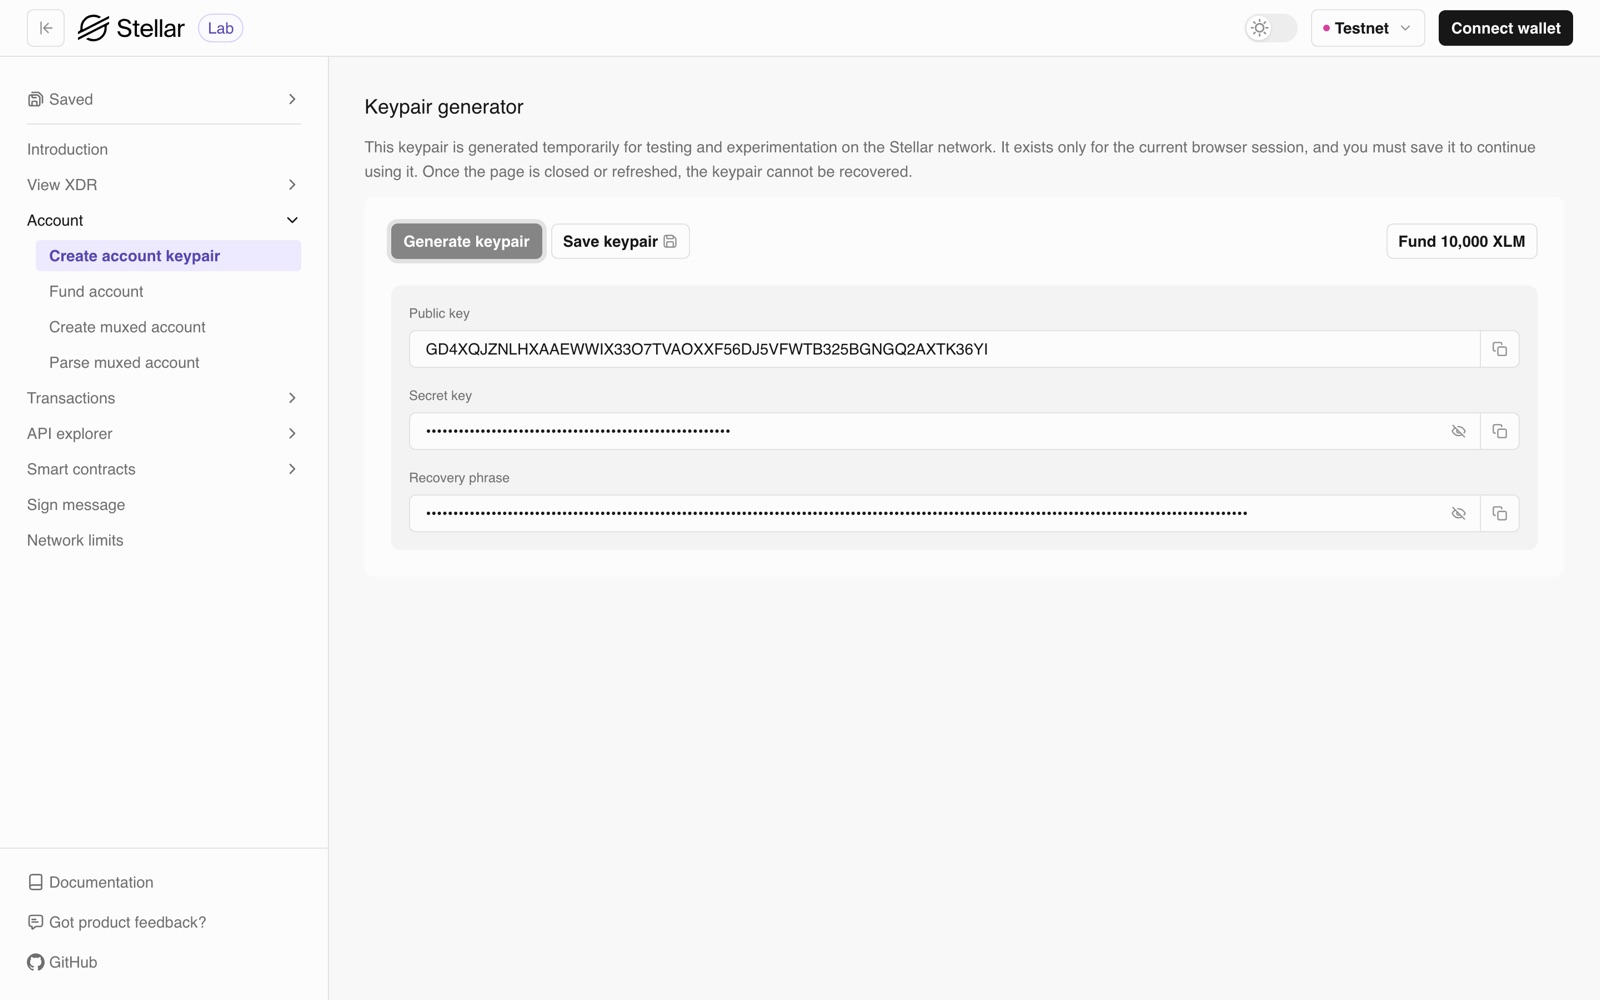
Then click Fund 10,000 XLM. That's Friendbot, a faucet that only exists on testnet. An account on Stellar doesn't exist until it holds some XLM, so this is the step that actually creates it.
Step 3: Create the distributor
Click Generate keypair again, save the new pair under DISTRIBUTOR, and fund it the same way.
These are the two accounts I ended up with, in case it helps to see real ones:
ISSUER       GD4XQJZNLHXAAEWWIX33O7TVAOXXF56DJ5VFWTB325BGNGQ2AXTK36YI
DISTRIBUTOR  GAUAN3I7C77FPNSXIN2ZKLQHWVSKRM5VOSMI23FT7KC5JISL67HW2JWS
Those are only the public keys. Secret keys never go in a blog post, even testnet ones.
Step 4: Let the distributor accept the token
This one caught me off guard the first time. On Stellar, an account can't receive a token until it has agreed to hold it. It stops people from spamming random tokens into your wallet.
So before the issuer sends anything, the distributor has to say it's willing to hold ZARY from this particular issuer. That agreement is called a trustline.
Go to Transactions, then Build transaction.
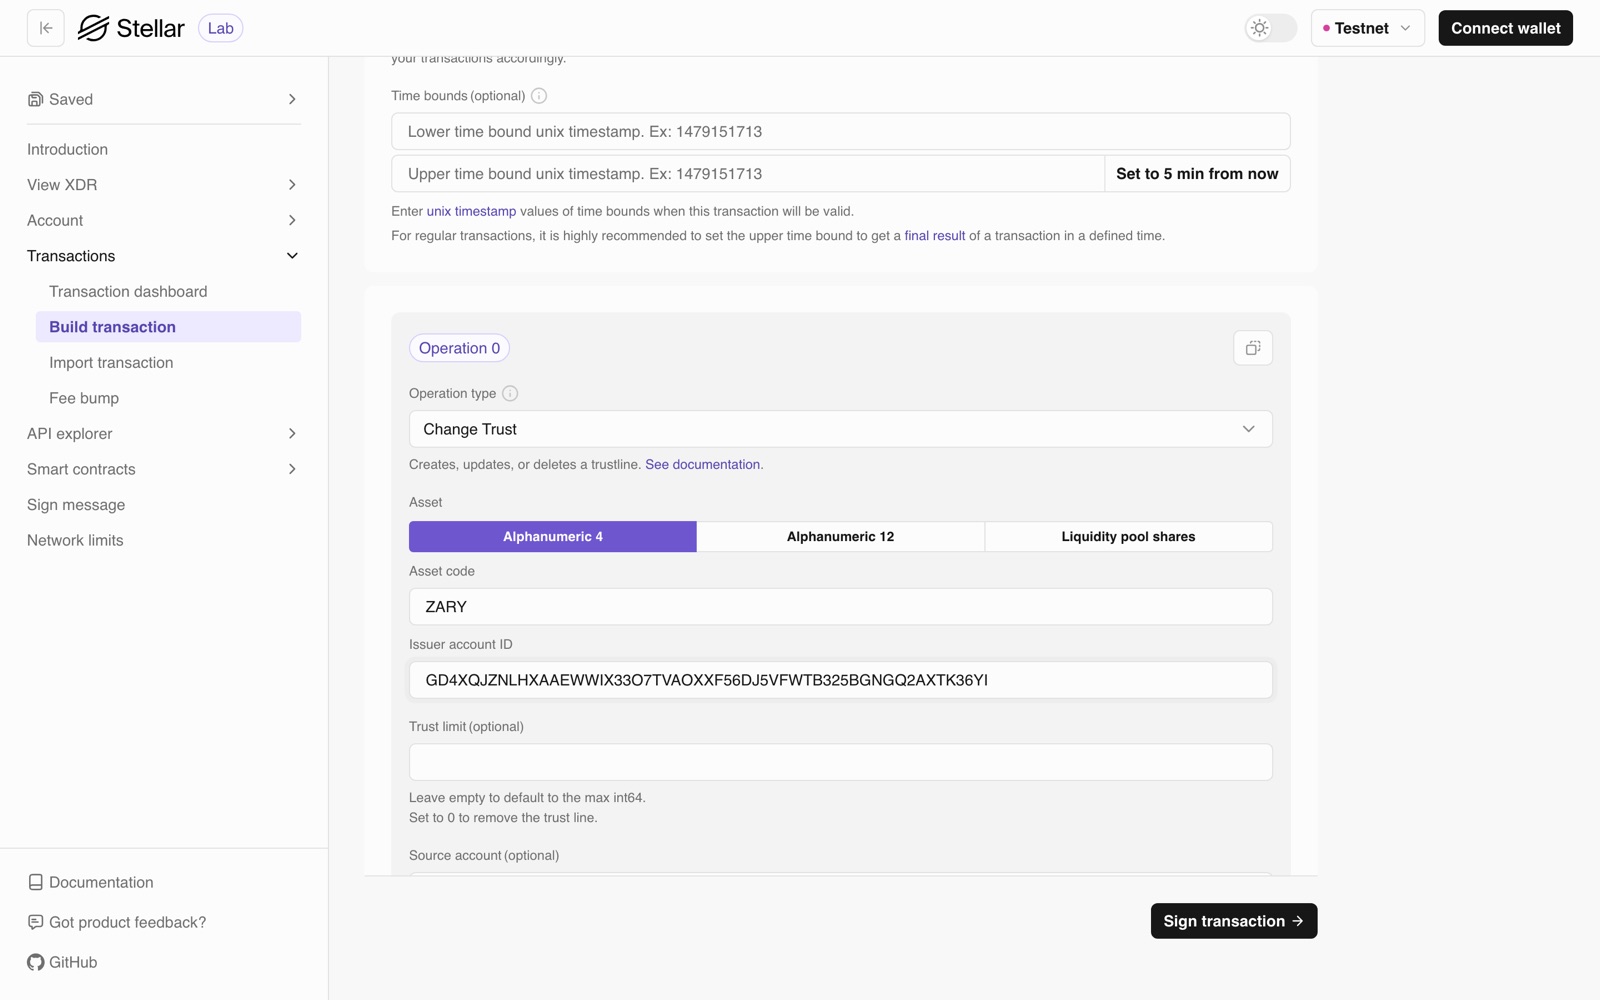
Put the distributor's public key in Source account, because the distributor is the one asking. Then click Fetch next sequence and Lab fills in the sequence number for you. I left the base fee at 100 (that's 0.00001 XLM) and skipped the memo and time bounds.
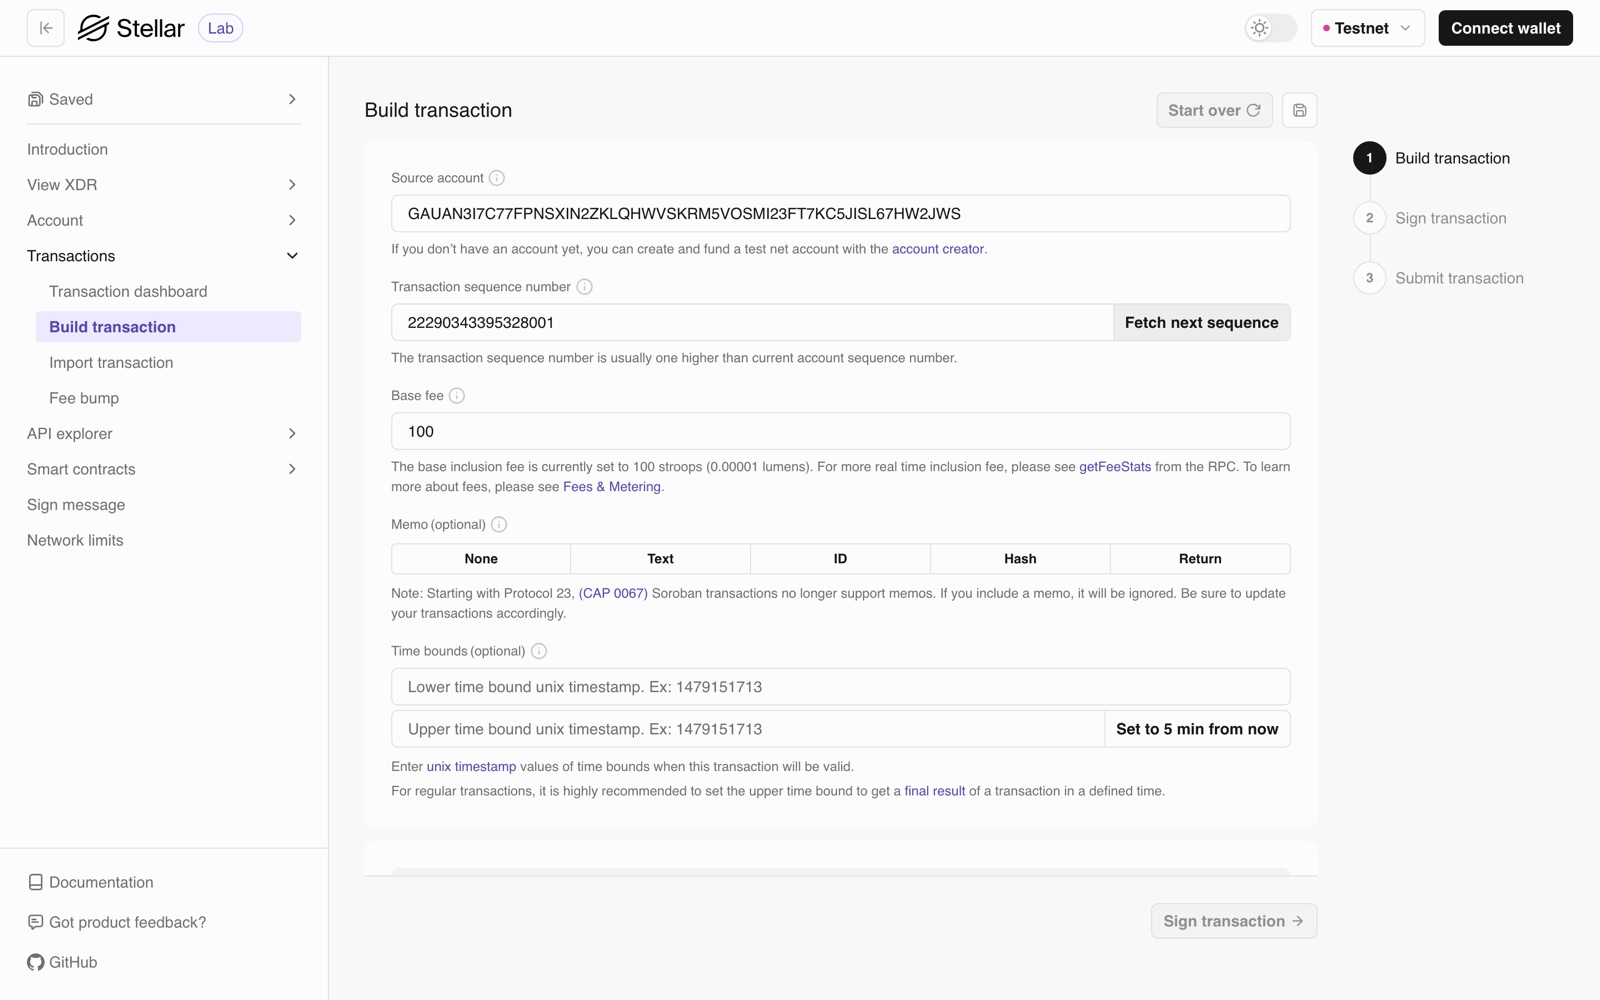
Scroll down to Operation 0 and choose Change Trust as the operation type. Pick Alphanumeric 4, since ZARY has four characters (anything from 5 to 12 characters would be Alphanumeric 12). Type ZARY as the asset code and paste the issuer's public key into Issuer account ID. I left Trust limit empty, which means no limit.
Click Sign transaction. Lab gives you a few ways to sign. The easiest is Sign with secret key: paste the distributor's secret and click Sign. The rule I keep in my head is that whoever is in Source account is the one who signs.
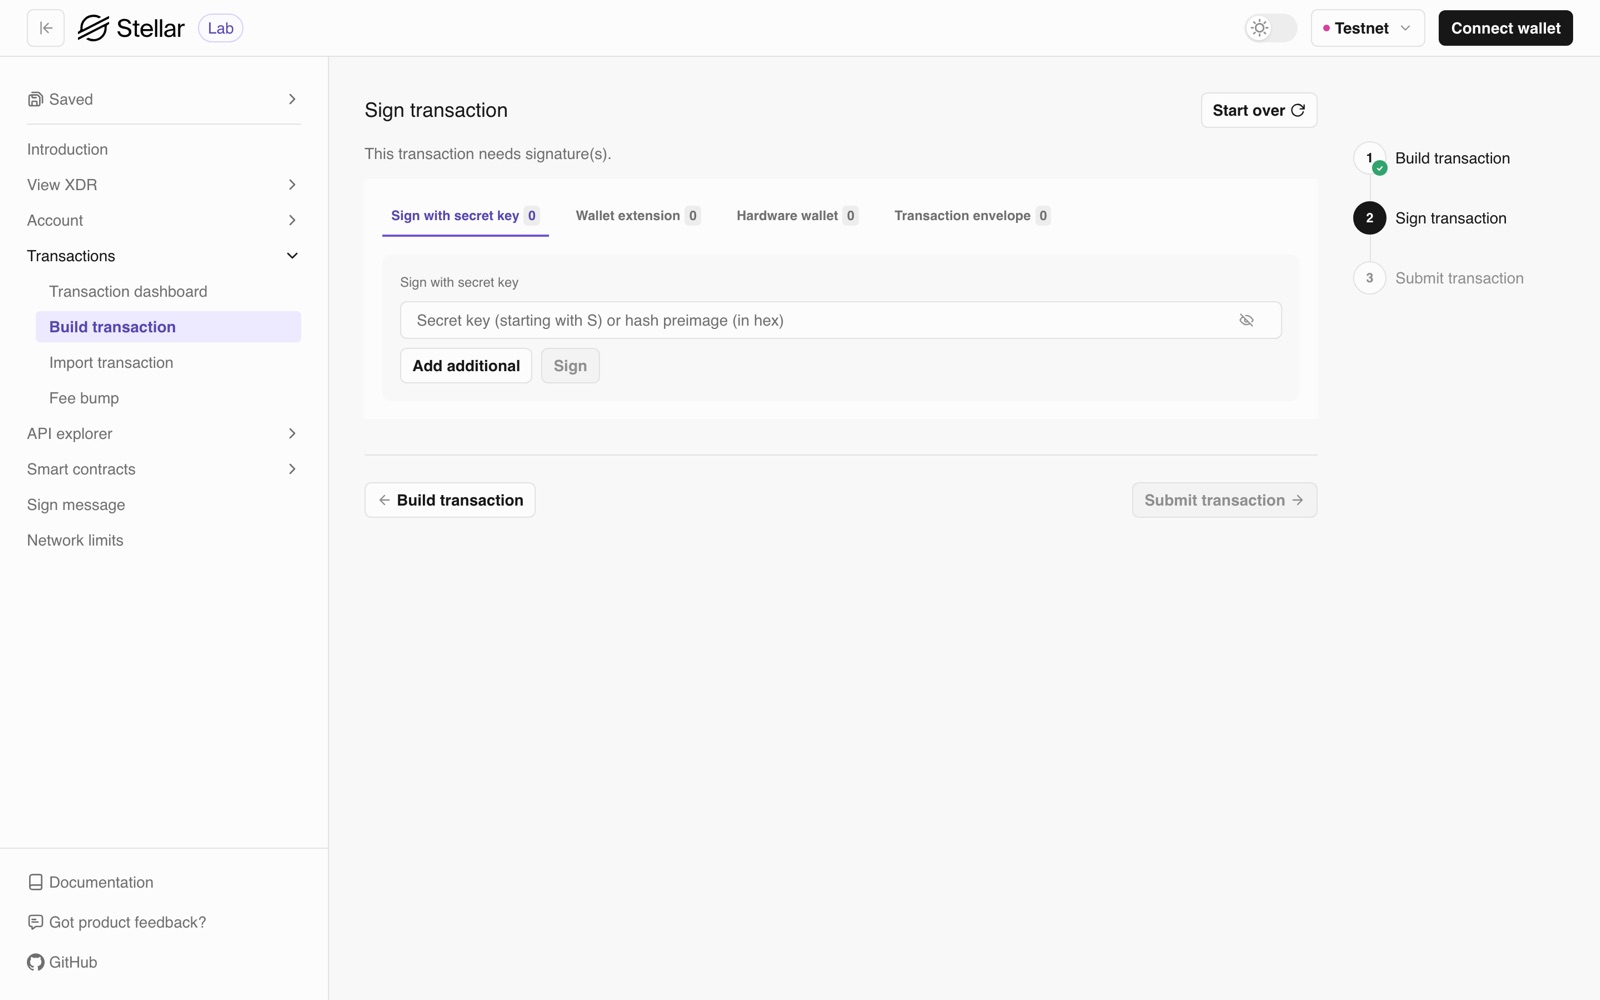
On testnet I don't mind pasting a secret key into Lab. With real money I'd sign through a wallet extension like Freighter instead (that's the Wallet extension tab), so the key never leaves the wallet.
Now click Submit transaction, and then the Submit transaction button on the next page. After a couple of seconds you should get a green "Transaction submitted!" box with a hash.
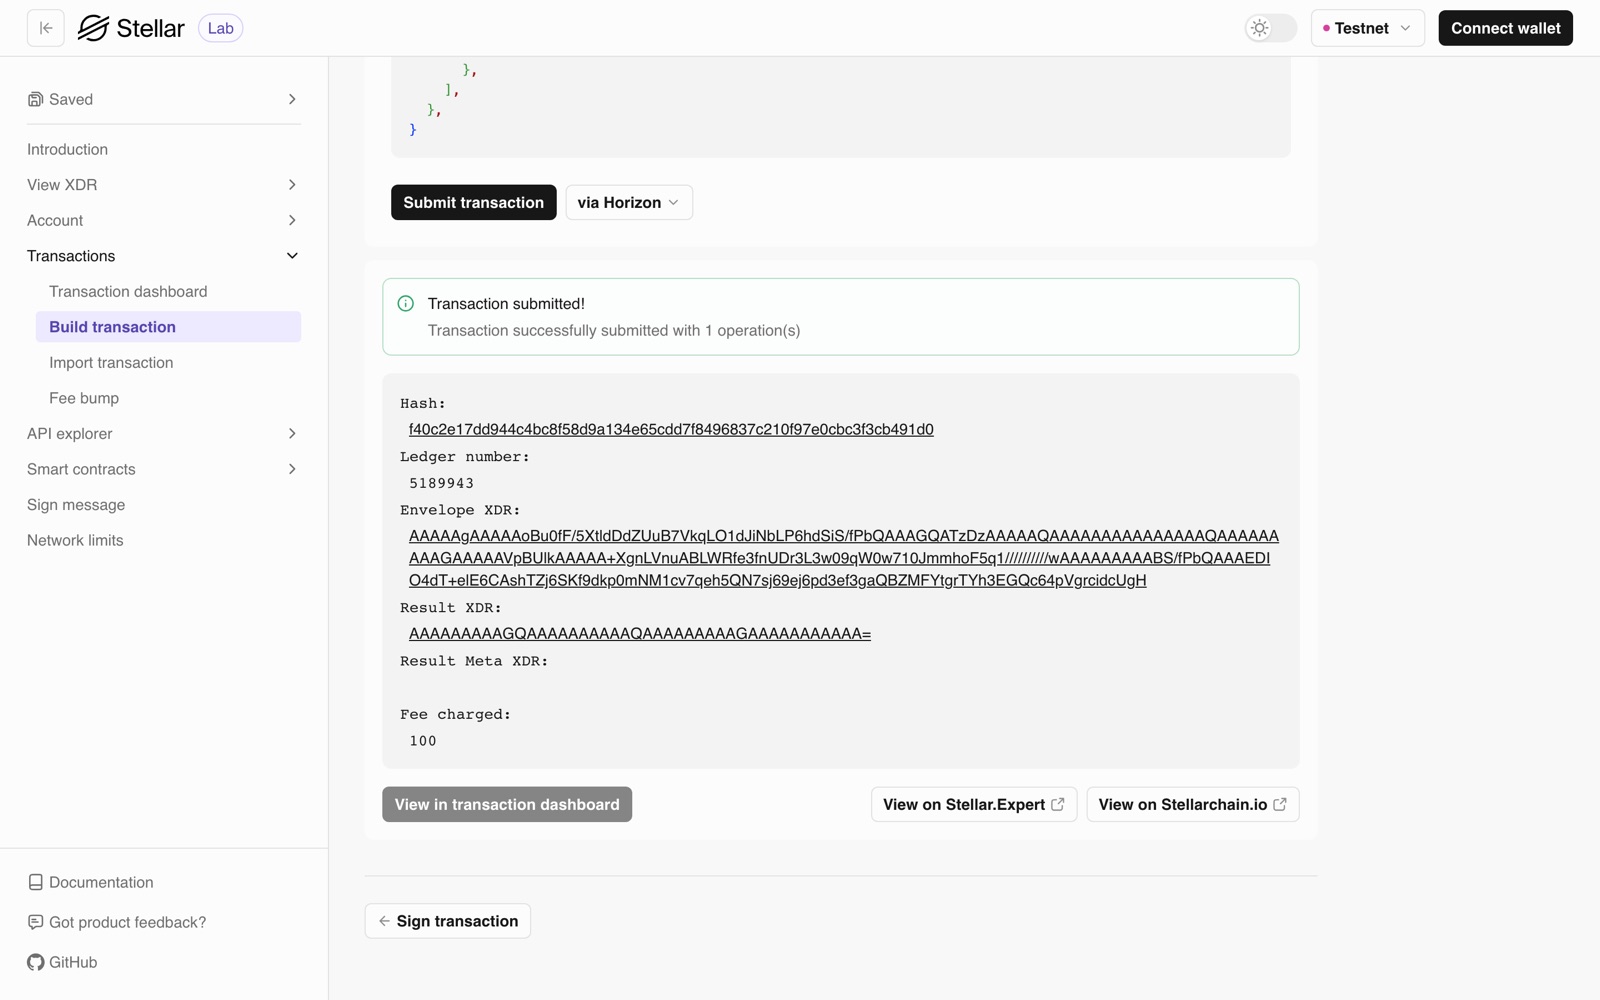
No ZARY exists yet at this point. The distributor has just agreed to accept it.
Step 5: Mint the supply
This is my favourite part. The issuer sends ZARY to the distributor, and that's what creates it.
Back in Build transaction, click Start over to clear the old one. This time the issuer's public key goes in Source account. Click Fetch next sequence again.
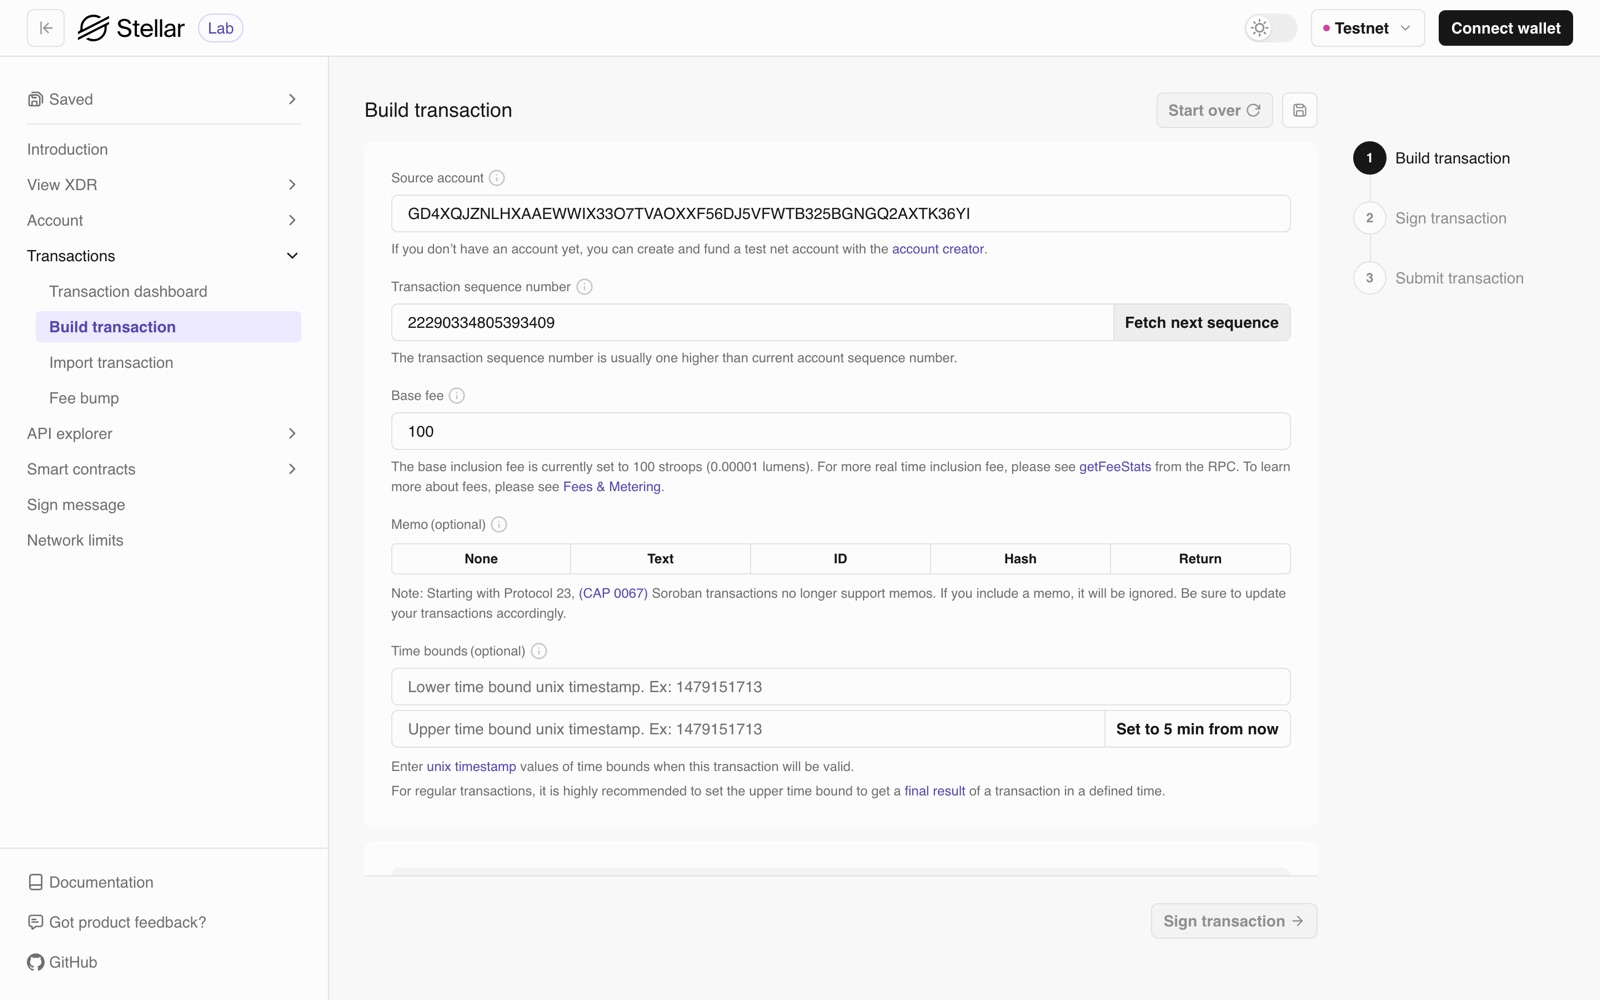
Choose Payment as the operation type. The destination is the distributor's public key. For the asset, pick Alphanumeric 4, type ZARY, and paste the issuer's public key again. In Amount, enter the full supply. I went with 1000000.
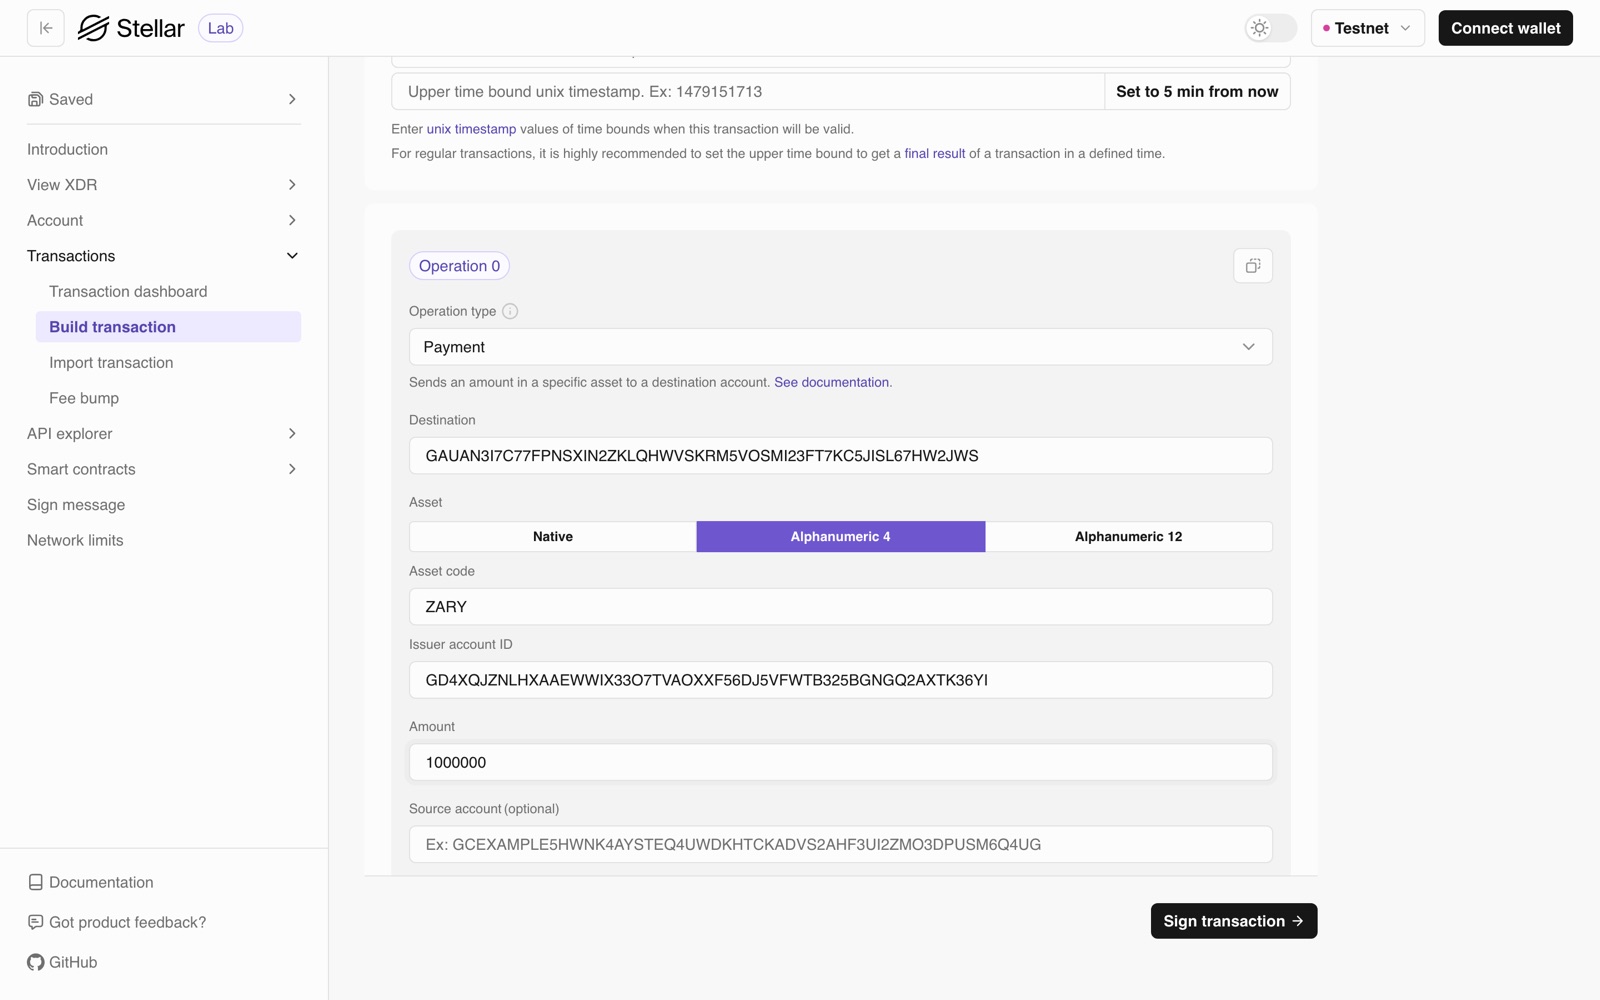
Sign it, but with the issuer's secret this time, since the issuer is the source now. Then submit it like before.
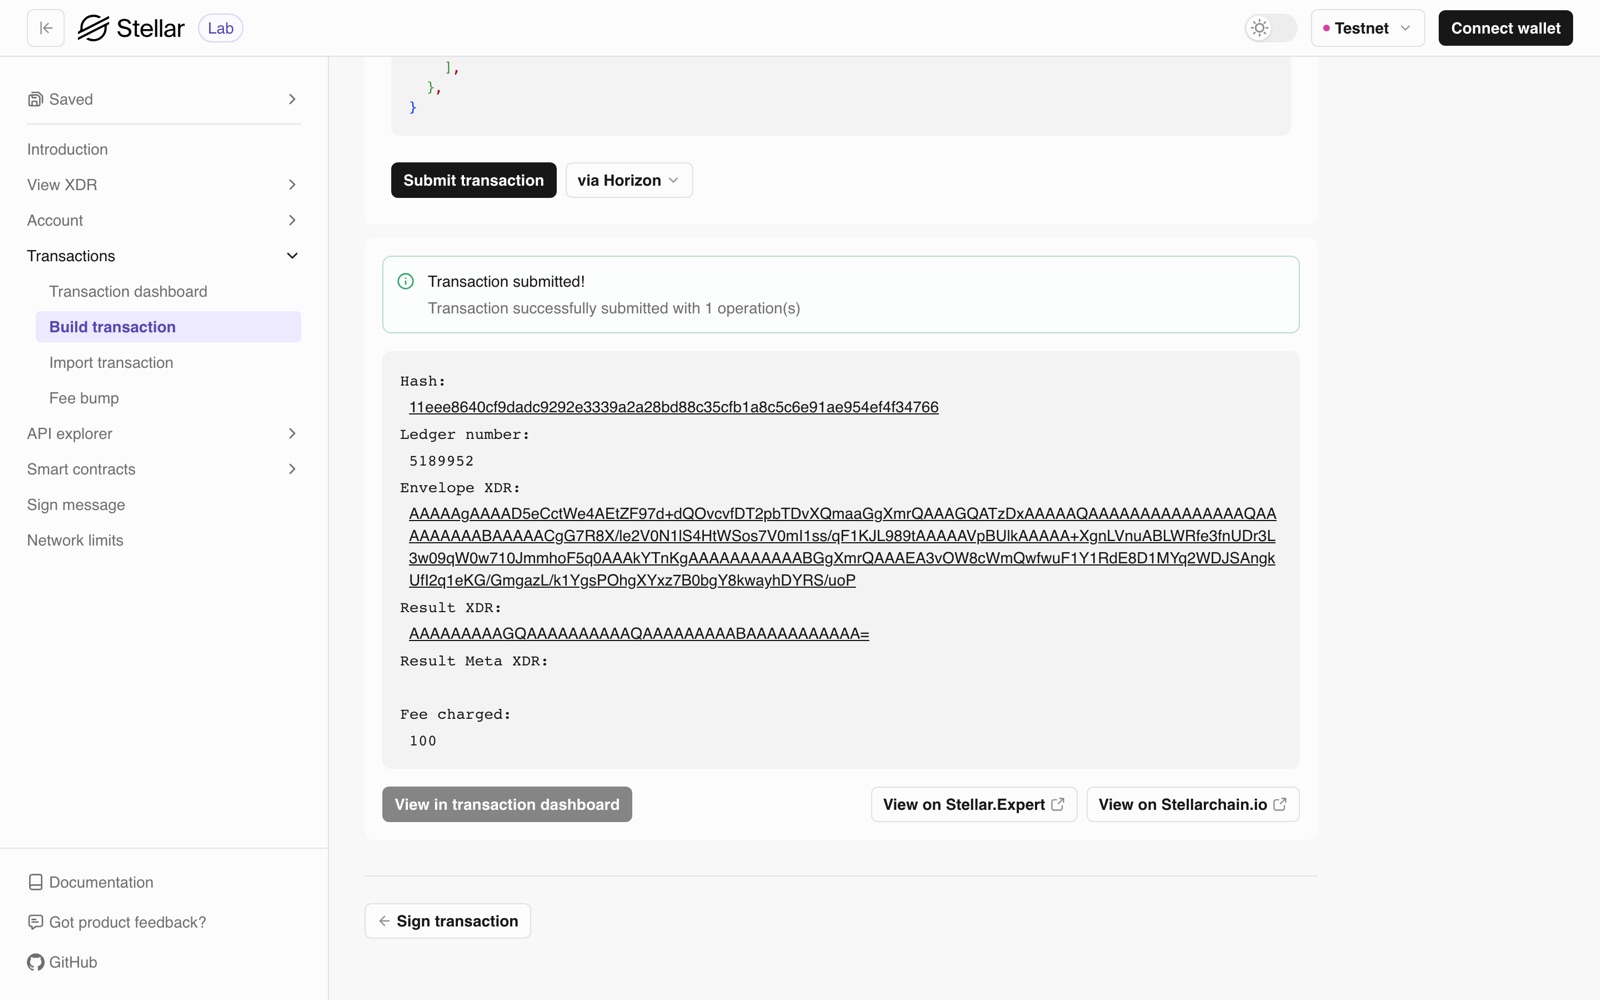
That's it. One million ZARY now exist, and all of them are sitting in the distributor's account.
Step 6: Make sure the tokens arrived
Lab said it worked, but I still wanted to see the tokens myself. I opened stellar.expert, switched it to testnet, and pasted in the distributor's public key.
Under the balances there were two boxes: just under 10,000 XLM (the fees took a tiny bit) and 1,000,000 ZARY.
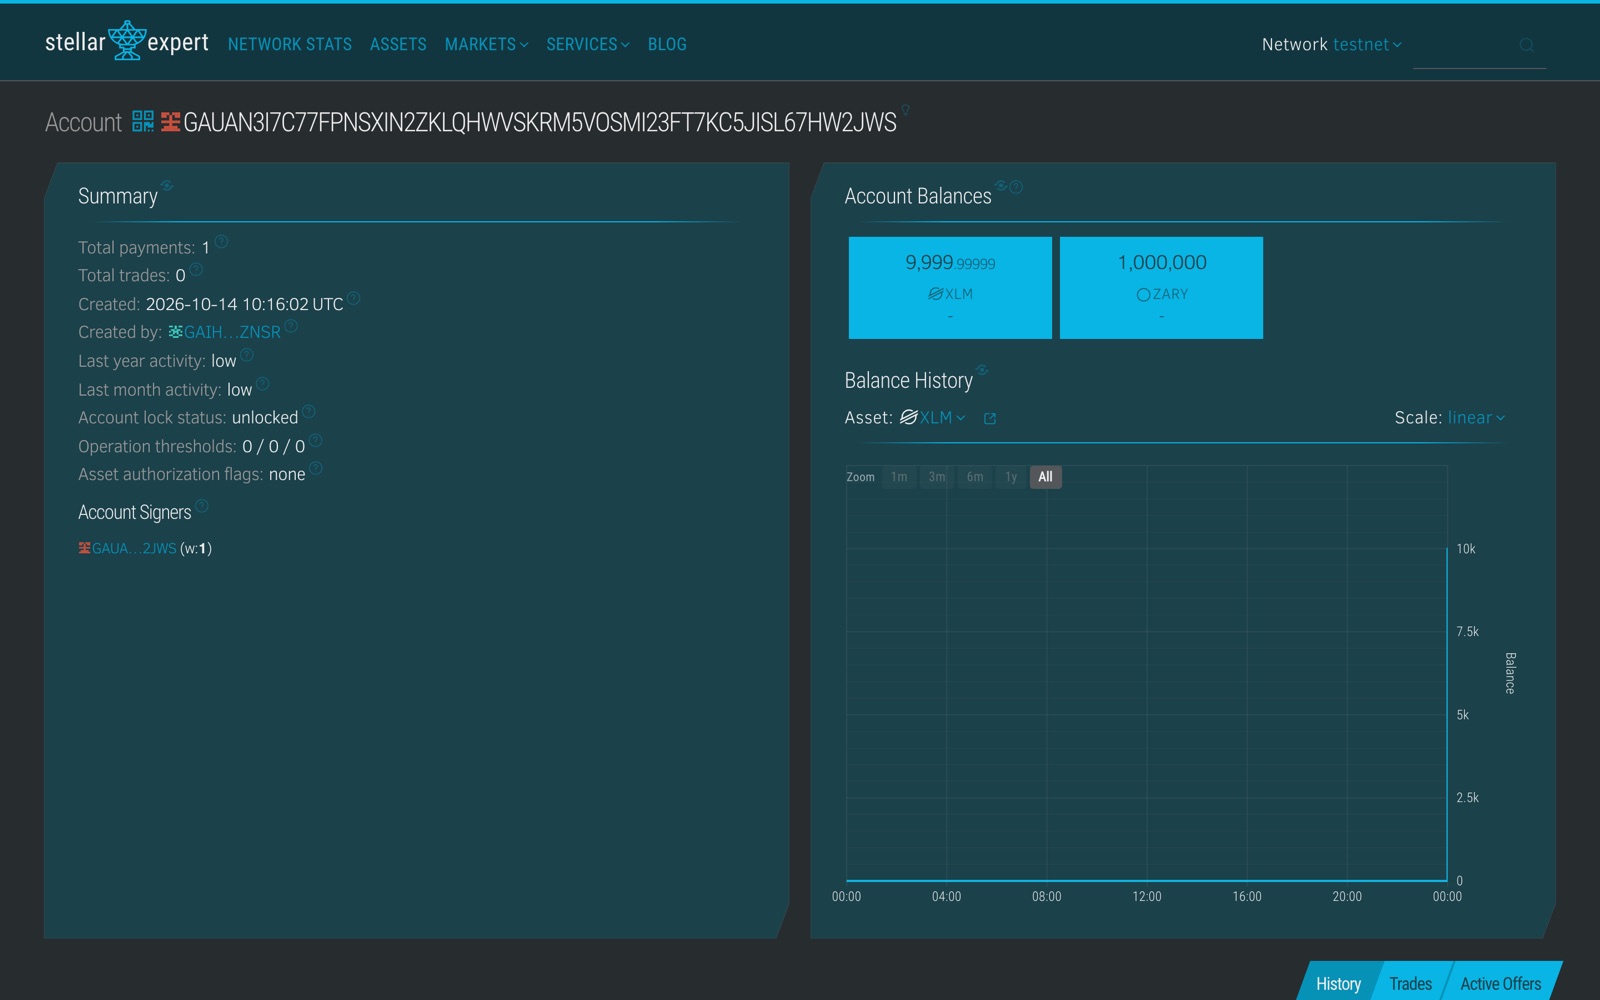
If you search for the issuer, there's no ZARY there at all. That's expected. The issuer never holds its own token.
Step 7: Lock the issuer (optional)
At this point the issuer could still print more ZARY whenever it wants. If you want the supply to stay at one million for good, you can lock it.
Be sure before you do this, because you can't undo it. A locked account can never sign another transaction.
In Build transaction, put the issuer in Source account and fetch the sequence number. Choose Set Options as the operation type and set Master weight to 0. Sign with the issuer's secret and submit.
Lab shows a red warning that this "can result in a permanently locked account". Here, that's exactly what you want.
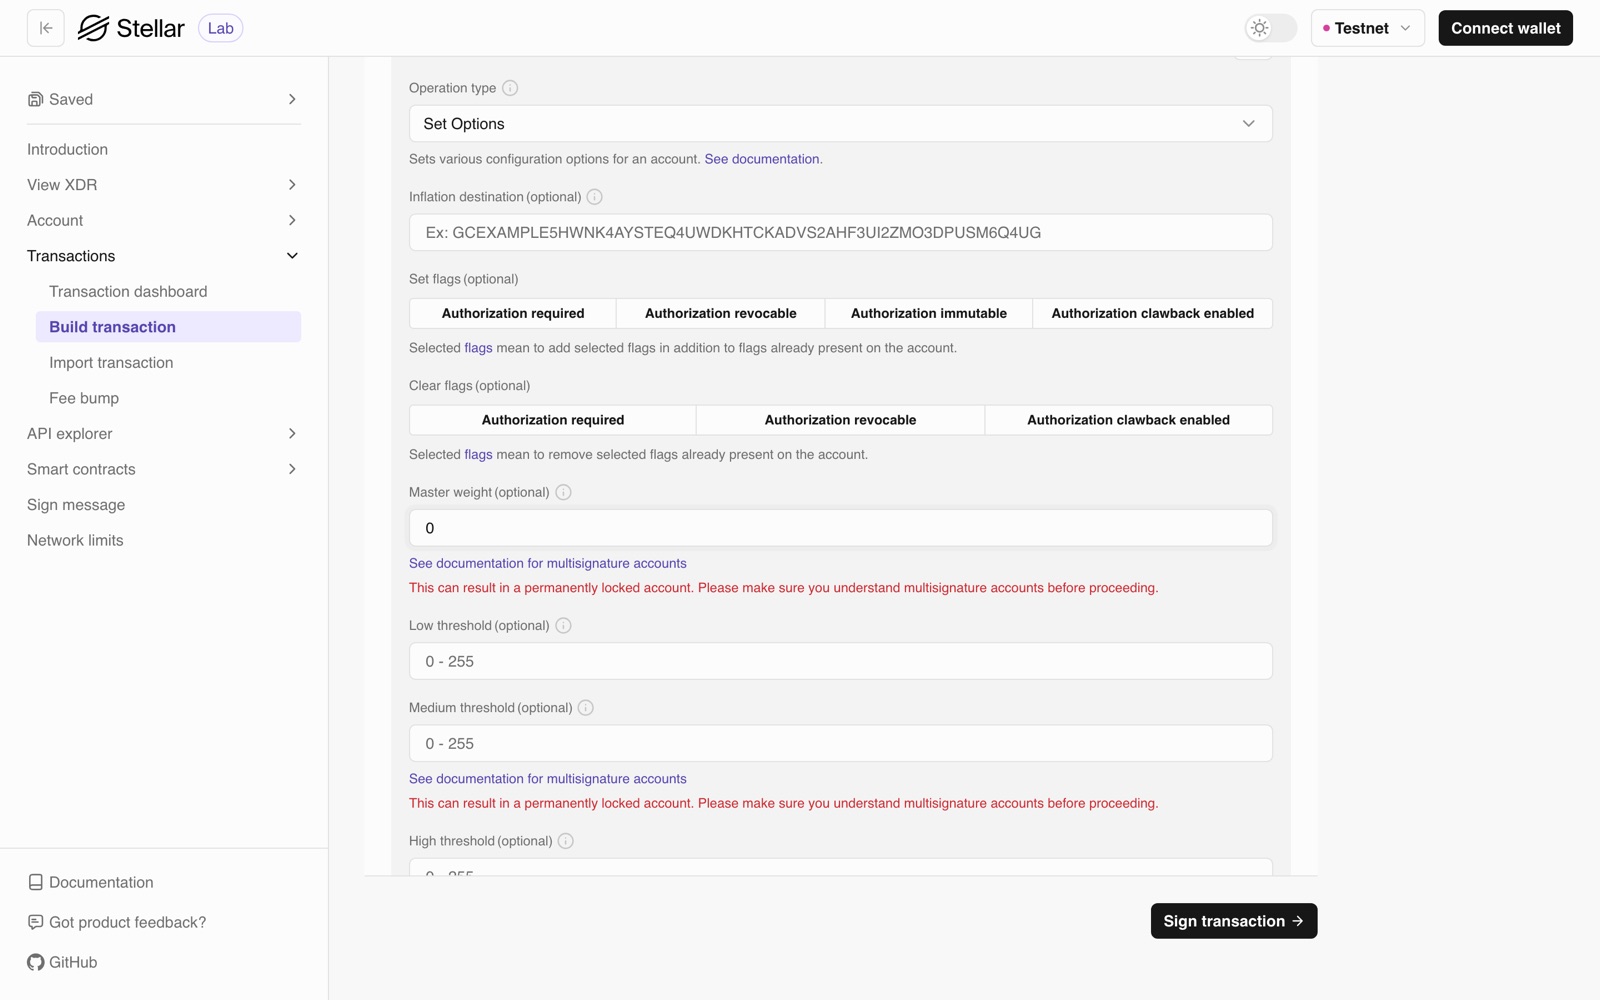
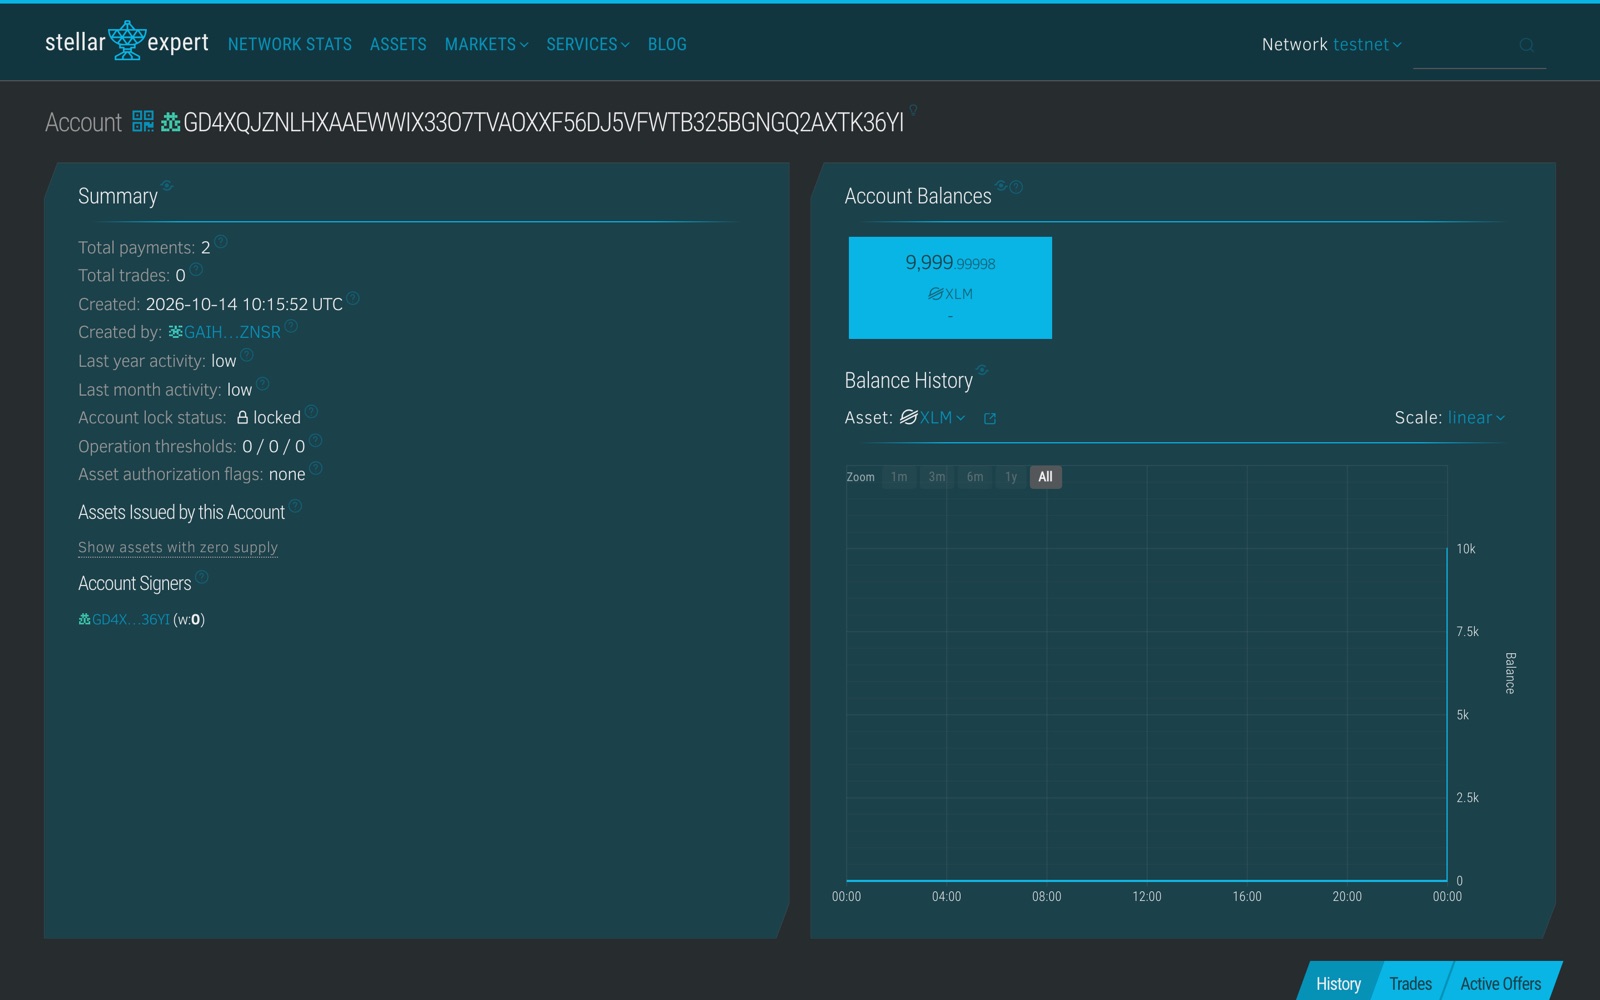
Afterwards, look the issuer up on stellar.expert again. It now says "locked" and the signer weight is 0. Nobody can create more ZARY now, me included, and anyone holding it can check that for themselves.
Before you lock, though, set a home domain on the issuer. It's in Set Options too. Then put a stellar.toml file on that website with your token's name, logo and description, because that's where wallets look for them. I learned the hard way that once the issuer is locked, you can't change the home domain anymore.
Things that went wrong for me
The first time I tried the payment, it failed with op_no_trust. I had skipped the trustline. The distributor has to accept the token first, which is Step 4.
I've also hit tx_bad_seq a couple of times. That happens when the sequence number is out of date, usually because I built a transaction, got distracted, and sent something else in between. Clicking Fetch next sequence right before signing fixes it.
tx_bad_auth means the wrong key signed. The trustline is signed by the distributor. The payment and the lock are signed by the issuer.
Asset codes are case sensitive, so ZARY and Zary are two different tokens. I nearly shipped a typo once.
Wrapping up
Recapping the whole thing:
- Create an issuer and a distributor.
- Have the distributor trust your token.
- Send the supply from the issuer to the distributor. That's the mint.
- If you want a fixed supply, set the home domain and then lock the issuer.
I was expecting contracts, audits and a compiler, and it ended up being four forms in a browser. The tricky part is understanding which account is allowed to do what. The clicking is easy.
When you want to do this for real, switch Lab to Mainnet, fund both accounts with real XLM, and repeat the same steps. Be a lot more careful with the secret keys there.
If something doesn't work for you, message me and I'll try to help.
Working on something similar?
I build this kind of thing for clients.